INTRODUCTION TO YOUR SUPPORTING ROLE
What is a Controller? A Controller is a SUPPORT class in this game (played in BOT lane with a Marksmen (ADC). It is their responsibility in bot lane and throughout the game to increase the sustainability of their teammates to secure kills and key map objectives. In team fights you should be careful and avoid getting caught up in the middle of a fight as your Enforcers (Tanks) and Tanky Built Bruisers should be trying to absorb as much damage as possible so the rest of your team can position themselves where they need to be! You need to hang back with the Marksmen and Blasters. ALSO, keep in mind that if your heals/shields are on cooldown you can take a body shot for them and help them escape. SOMETIMES, if your ally is low on health and it is clear your heal/shield wont heal them enough before the enemy kills them....it is okay to steal that killing blow to prevent your teammate from dying. DO NOT be afraid to Ping that retreat and remember if your ADC or other teammates are playing dumb and going in too deep (over extending themselves), don't sacrifice yourself with them. Keep your eye on map objectives and if your lane enemies are Missing In Action (MIA) If they are MIA then you NEED to let your team know to prevent any surprise ganks. If you get the MIA back in your lane, it is best to hug your tower and farm safely under it to prevent getting ganked until you get the all clear.
NOTE I build the Controllers Zatanna, Harley Quinn, Poison Ivy and Nightmare Superman very similar. They benefit the most off of this standard guides. ALSO, I know that many people don't play enough to get all the merit they need for certain Mod Items, Augments and Stolen Powers...With that in mind, even if you don't have the things I suggest unlocked, if you follow the guide it will tell you what other options you can use in your build.
__________________________________________________________________________________________________________
SKILL USE TIPS
The more you understand the skills, the better you will be at using them/timing them perfectly! Please keep in mind that you need to stay out of the eye of the storm (middle of the team fight)! Nightmare Superman is probably the best counter to

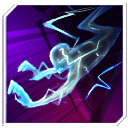
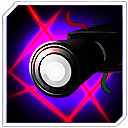
PHANTOM COLLECTOR (Q) Cooldown: 5.0s 25 Will
Summons a phantom at a target location that flies back to him, dealing 60 Power Damage and stealing 4.0 Power Armor (+1% per 333 Bonus Will) for 5s from enemy Champions. Upon returning to Nightmare Superman, all nearby allied Champions gain 2.0 Power Armor (+1% per 333 Bonus Will) for each enemy Champion hit for 5s. This is a great skill for stealing power armor so enemy champions are more vulnerable to your Blasters, Hybrid Marksmen, or even Power Damage built Enforcers and in return it grants power armor against the enemy champion.

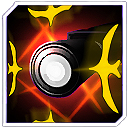
VORTEX (W) Cooldown: 15.0s 55 Will
Opens a vortex on the ground. Enemies in the vortex lose 20% (+1% per 100 Bonus Will) Move Speed. It will close after 3s, or if the skill is used again. When it closes, it deals 30 to 60 Power Damage, depending on how long the vortex has been open, it closes pulling all enemies in the area towards the center, and Stuns them for 0.25s. This is great for pulling the enemy team closer together for better focus on AoE attacks in team fights and temporarily disrupts their attacks. By grouping them together, your team is better able to use their champs that us attack area skills. You can also bait the enemy team into a stealth pad where a VORTEX is waiting to slow them and your enemy team ready to pounce. Also, be sure to use this early game when the jungler comes in to close group the enemy champ together if your jungler has more of an AoE play style than single target

SIPHON-INFUSE (E) Cooldown: 12.0s 70 Will
This is my favorite skill as its Siphon (Enemy): Deal 60 Power Damage and then grant a Shield that blocks 35 damage for 3s to two allies near the target and the Infuse (Ally): Grant a Shield that blocks 70 damage for 3s and then deal 30 Power Damage to two enemies near the target. It's great for protection and for it's damage compliment on his shields. You can throw it on an ally that is chasing down an enemy champion and it will shield them and hit the retreating champion. You can also hit your own minions in lane and your attack will then hit the enemy champs in lane.
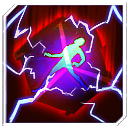
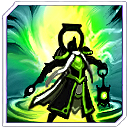
CONDEMN (R) Cooldown: 120.0s
This is an amazing lock down. Maxed out it locks down an enemy 2.25s. Focus on hitting their Marksmen, Blaster or Assassin depending on who is in the team fights and who has the most potential in positioning to wipe out your team.
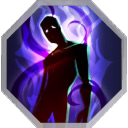
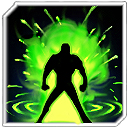
POSSESSION (PASSIVE) Trigger (Cooldown: 180s):
When defeated, Nightmare Superman possesses the enemy Champion that defeated him. They are Revealed and lose 15 Power Armor and 15 Attack Armor for 6s. If the target is defeated while Possessed, Nightmare Superman is revived with Health equal to 30% (+1% per 150 Bonus Will) of the target's Max Health. This is great if your team is coordinated you can come back to life to help with more shields and crowd control.
__________________________________________________________________________________________________________
STARTERS ITEMS:
 Nil Ring
 Gives you great starting Heath, Will Regen and Power Damage early game.
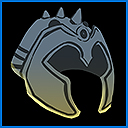 Gorilla Grodd's Helmet (1)
 Great Will Source and at Teir 2 you get
Passive - Investment: When sharing Drone credits with one or more allies, the overall value is increased by 20%. As with all credit sharing, this bonus is distributed equally between yourself and nearby allies. Investments do not stack with other Investments, the maximum bonus is 20%. SO Build To TIER 2 FIRST Before moving onto Amulet of Isis. Once you build beyond T2 you will no longer get the investment passive.
 Modular Health Vial (1)
 Restores 100 Health over 15 seconds
 Modular Will Vial (1)
 Restores 200 Will over 15 seconds.
__________________________________________________________________________________________________________
CORE ITEMS:
 Gorilla Grodd's Helmet (4)
 Provides Will, Cooldown Reduction and Resilience to nearby allies. It's
Passive - Gorilla City Aura: Gives +15% Resilience for all nearby allies (this means it reduces the duration of crowd control affects like stuns and slows). Its
Active - Psychic Shield: Applies a Shield that blocks 40 damage (40 + 6/Level + 8% Bonus Will) to a target for 3s. While the shield lasts, the target is immune to Disables (60s Cooldown). Pop this on the person with the Dooms Day Device to give them that extra bit of protection or on an ally that needs that extra bit of protect to escape or take out a turret that's 1-3 basic attacks from being destroyed. ONLY build past T2 when the laning phase has ended (when you are roaming the map because you have either lost/destroyed towers). Also build Amulet of Isis, Qward Gambit first.
 Amulet Of Isis (3)
 Will, Health , Cooldown Reduction and Movement speed as well as its
Active - Mercury's Gift: Gives you 25% Move Speed buff to all nearby allies for 2s (60s Cooldown). I always build it on EVERY support as it is key for retreating or chasing down the enemy team (DON'T CHASE if they are objectives you need more OR IF the enemy team is alive and missing from their lane AS THEY MIGHT be trying to lead you into an ambush. NOTE: After GORILLA'S T2 Build AMULET OF ISIS all The Way To Teir 3
 Qward Gambit (4)
 For the laning phase. Build to Teir 4 once the laning phase is over and you are roaming the map it's great for Will and Power Damage. Its Passive - Qward Aura: +20 Power Damage and +10% Power Lifesteal for all nearby allies. It's
Activate - Protection Field: Grants a Shield that blocks 35 damage (35 + 5/Level + 5% Bonus Will) to you and nearby allies for 4s (90s Cooldown). This is ideal if you find your team ALMOST winning out team fights but just falls a bit short on its health/armor. It is also great for its power life steal. Build All The Way to T4 Then IF you need more manage then move to Eye, or if you need more of a team shield, finish builiding
Gorilla Grodd's Helmet (4). After this THEN move on to Eye of Ekron.
 Eye Of Ekron (4)
 Will, Power Damage, Health, Movement. You need to keep building your will to keep your builds foundation relevant. It's
Passive - Will Force: Grants Power Damage equal to 2% Bonus Will.
 Atlantean Royal Seal (4)
 Health, Power Damage and its Passive - Skill Harrier: Causes your targets damaged by your skills lose 20% Move Speed for 1.5s (10% for multi-target skills). This works great with your SIPHON-INFUSE (E) as well as your PHANTOM COLLECTOR (Q) as they can hit more than one target to slow more than one enemy.
__________________________________________________________________________________________________________
DEFENSIVE ITEMS:
 Entropy Aegis (3) Passive - Skill Block 1: :
 Grants a Skill Shield that prevents the damage and effects of the next enemy skill (60s cooldown). This item is great to have against enemy teams that have a Shazam, Wonder Woman, Atomic Wonder Woman and any other surprise attack champions/global ultimate champions. This shield will block 1 skill shot, then will re-set again, once 60s goes by. This way the enemy team now has to try and hit you out of position first to proc your Aegies THEN try to go in for the kill. This is a great items that makes the other team have to work harder to get to you and gives your team time to focus and re-position themselves.
 Steel's Breastplate (3)
 Health, Will, Attack Armor. Its
Active - Iron Will: Activate to redirect 20% of damage taken to your Will for the next 5s (60s Cooldown).
 Mirror Master's Prism (4)
 Health, Power Armor and its
Passive - Deadly Mirror 2: Gives 20% Power Reflect. If you are in need of Power Armor I would only build this POWER ARMOR item as many Power Damage champions will legit 1 shot themselves. THIS IS an OPTION But I still suggest
Entropy Aegis (3) over it for it's passive.
__________________________________________________________________________________________________________
SITUATION ITEMS:
 Bleed Portal
 Target an environmental object to create an entrance. Target a second environmental object to create an exit and open a connected portal for 60s (120s Cooldown). You can always MOD Bleed Portal to make the EXIT First then create the ENTRANCE Last. This is great if you want to escape back to base after a push for a particular capture point. I only advise MODing it if you are in a pre-made group and have decided to run this strategy!
__________________________________________________________________________________________________________
MODS:
These MODS can be changed depending on what part of the above items you want to focus on building. Keep in mind you want to choose items that are going to best buff both you and the team for surviving in team fights, let the Assassins, Marksmen and Blaster worry about building damage. You need to worry about absorbing damage and reducing the damage dealt to your team and crowd controlling the enemy team.
Amulet Of Isis (3) Mercury's Gift: Activate to give nearby allies a 35% Move Speed boost for 4 seconds.
Atlantean Royal Seal (4) Passive - Skill Harrier 2: Targets damaged by your skills lose 25% Move Speed for 1.5 seconds (15% for multi-target skills) (Tier 4) .
Eye Of Ekron (4)Passive - Will Force 2: Grants Power Damage equal to 4% Bonus Will.
AUGMENTS:
CASTLE: 24.6 Health and 3.25 Attack Armor
BEST: 3.01 Health/Level To 57.19 (Max Level) and 0.32 Attack Armor To 6.08(Max Level)
WRECK: 3.01 Health/Level To 57.19 (Max Level) and 0.32 Power Armor To 6.08(Max Level)
WOLF: 24.6 Health and 3.25 Power Armor
These augments give you the Best Health and Power/Attack Armor Combined. I build the same augments on all my controllers and enforcers for bot lane. The reason for this is because you want your controller early game to be able to take a couple of hits in case you have to jump in and take a body shot for your bot lane partner (Marksmen aka ADC). That is why I build 2 Flat Health and Power/Attack Armor Items. I also build scaling Health and Power/Attack Damage Items for late game to scale so you can still take those extra hits if you need to for your team as the enemy champs would have built up enough damage to really hurt by then. You already get good movement speed, cool down reduction and damage from items in your core build. You can build one defensive item if worse comes to worse, however, you get more advantage by using Augments to buff you up a little bit then wasting spot for a key item in place for health/armor.
__________________________________________________________________________________________________________
MAIN STOLEN POWERS:
We all know that your team composition is KEY! So...depending on your team comp and the stolen powers your team mates are choosing you may have to change around the stolen powers you use (adjust accordingly). These are the standard ones for SOLO QUEUE!
ALWAYS HAVE
 Surveillance Camera
 Cooldown: 5s Gain 3 charges that are spent to place Stealthed Surveillance Cameras that grant vision in an area around them for 180 seconds. Up to 2 Surveillance Cameras may be on the battlefield at once. Charges are refilled automatically upon returning to base. I suggest using
 Robin's Surveillance Camera
 as your go to cameras because you get 5 charges instead of 3. This set up is ideal for all roles as it prevents you from having to run to base to get more charges of cameras each time you run out.
 Healing Wave
 Healing Wave Cooldown: 120s Heal yourself and nearby allies for 50 Health. Further Healing Waves within 30 seconds will have their effectiveness reduced by 50%.
 Arcane Green Lantern's Healing Wave
 I love this Healing Wave over any other as it gives you additional Attack & Power Armor when you need it most. While I do admit
 Krypto's Healing Wave
 has greater lane sustain over time. A lot of the time, these team fights don't last long enough to make the over time healing wave worth it.
OPTIONAL STOLEN POWERS:
When you are in a pre-made group of 3 or more , then you can change up your stolen powers a little bit. The reason I suggest these alternatives is so you can get an idea which ones usually work best in both PRO and CASUAL matches. ALWAYS keep cameras!
ALTERNATIVE ONE You can replace
Arcane Green Lantern's Healing Wave with
 Psychic Assault
 Cooldown: 120s Places a 35% slow on a target enemy for 2.5 seconds. I suggest using
 Zatanna's Psychic Assault
 Cooldown: 120s as it applies a stronger slow and lasts longer - Target enemy Champion loses 40% Move Speed for 3 seconds OR
 Star Sapphire's Psychic Assault
 Cooldown: 120s as it reduces incoming healing as well as slowing. Places a 35% slow on a target enemy and reduces incoming healing by 50% for 3 seconds. This stolen power is ideal for early game ganks for your Jungler and gives that extra bit of crowd control for the rest of the game (use it to slow down an enemy to let your team mate escape or slow one down for that killing blow). When you choose this I suggest your Marksmen/Bot Partner choose the
Arcane Green Lantern's Healing Wave with his other Invulnerability Stolen Power.
ALTERNATIVE TWO You can replace
Arcane Green Lantern's Healing Wave with any
 X-Ray Vision
 Cooldown: 100s For 8 seconds your Champion has increased vision range, can see enemies in Stealth, can see through barriers and into stealth pads. I suggest using
 Atomic Poison Ivy's X-Ray Vision
 - Cooldown: 85s as Atomic Poison Ivy's X-Ray Vision has a reduced cooldown OR
 Gaslight Catwoman's X-Ray Vision
 Cooldown: 100s - Gaslight Catwoman's X-Ray Vision has a longer vision range.
__________________________________________________________________________________________________________
I Live Stream at Twitch.tv/Minerva_DH
__________________________________________________________________________________________________________


 where the FUCK is the 'guide'?