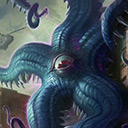
This is a guide for Starro on Coast City, which aims to minimise your chances of being a feederfish while learning to play Starro. It assumes that you're part of a team with poor coordination and aims to reduce the chance you will feed the enemy and bring shame to those who play this character. It's also a good strategy to use when you're suffering from lag (due to poor connection, or tiredness).
The basic idea
Starro's unique mechanic is his ability to create slaves. This build is based on two things: making slaves, and surviving gank attempts. People will always try to gank Starro: if he's being played well, then Starro's presence is a signal to the enemy that you're pushing a lane - they don't like that, so they will gank you. If he's being played poorly, then he's tasty tasty seafood - so they will gank you. If you're playing Starro well, expect to see 4 enemy champions in your lane, working to shut you down.
Your value to the team
It's possible to build up a very nasty squad of drones as Starro, perhaps 8 friendly drones and 4 slave drones. Enslavement allows you to turn an enemy push into a counter-push much more quickly than any other character. In addition to that, the opposing team will come for you a lot - that means that you reduce the pressure on the rest of the map. If you're lucky, then you'll be outnumbered in the lane all the time, and you won't die. If that happens, then the enemy will be starved of XP and coin. The other thing you can do is generate coins for your lane partner through drone kills.
Starro is also the only character who can turn the enemy's elite drones into your own team's assets. Once enslaved, they become your elite drones, and a nasty, surprising counter-push.
Basics
Try to avoid going into the jungle. There are no drones there, which means no slaves. Power relays and the doomsday device are the only good reasons to go into the jungle. If your team is hell-bent on a jungle invasion at the start, then showing up isn't very good for you, but it does avoid creating problems with the rest of your team.
Fight in the bottom lane, unless the enemy has elite drones in Top - in which case, go Top, and tell your team what you're doing. If they have elite drones in both lanes, then defend whichever lane is weakest.
Try to stay on the 'home' side of the drones. Ideally, you want friendly drones in between you and enemy drones, and enemy drones in between you and enemy champions.
Build W first, and fire it at an enemy drone. Attack that drone until it dies and becomes your slave. Repeat.
Build Q as soon as you hit level 2, and fire it at enemy drones. Because the enemy champions are on the other side of the enemy drones, you might hit them too. Bonus!
Build W and your passive hard - you want to be producing as many slaves with as many HP as you can, and you want the tanking bonuses that come from having lots of slaves.
Build E, and use it when either: you hit an enemy champion with your W, or an enemy champion is close to 3 or more of your slaves.
Build R, but don't expect it to be useful. It's really hard to use this ability well, and absolutely requires good teamwork for it to pay off. The best use as a Starro newbie is to grab enemies who chase you to the edge of your turret, and pull them into the radius. This will encourage them to stop chasing you a bit sooner than they otherwise might.
Don't hesitate to go back to the tower at the slightest threat. The tower is your friend - it keeps the enemy champions away, and future slaves will march blindly towards it, waiting for your parasite attack. The trick to out-leveling the enemy in a lane battle is to stay in the lane, and to be attacking drones whenever possible. You don't have to kill enemy champions to win - it's far more important to 'not die' than it is to kill (as Starro).
On running away
If you can land W on a champion who is chasing you, then use your E, they get a pretty significant slow on them. Once you have Atlantean Royal Seal at level 4, you can also use Q to slow down any champions it hits. And, of course, you've got a Super Speed (ideally Flash's stolen power), which means that in an emergency, you can run away quickly. Expect to do this a lot.
On pursuing enemy champions
This is rarely a good idea as a Starro newbie. Learn to defend and enslave first. It's not very cool, but it does win matches.
On mass enslavement of drones
Once you've mastered mass enslavement, you're ready to start doing tricky stuff. Pay attention to how Q does extra damage to enemies that have a parasite on. Learn how to hit large numbers of drones with one Q attack. Rejoice as you cut through a massive swarm of drones that threaten to overwhelm a friendly tower, and build their enslaved corpses into a counter-attack.
What to aim for
Your Kills/Deaths/Assists score should have a lot of Assists, very few Deaths, and any Kills that you get should be because one of the main damage-dealers on your team missed the set-up that you gave them. You should be able to stay in the lane much longer than most champions, and out-level the opposition through endurance and by being there when drones die. Your 'damage dealt' numbers should be very high, due to the tower hits and drone hits handed out by your slaves.
Artefact Build
Start with Gorilla Grodd's Helmet level 2, and level 2 health modules. The GG Helmet 2 comes with the Investment ability, which increases coins shared with your lane partner by 20%. You've got a lot of expensive stuff to buy, so start building that war chest from the beginning. Then grab Abin Sur's Lantern level 1 for the will regen aura. Then Atlantean Seal all the way to level 4, for Skill Harrier, because a slow enemy champion doesn't get to choose if they will fight or not. Avoid putting more levels into Gorilla Grodd's Helmet until late in the game - it loses Investment at level 3, and money is good.









 where the FUCK is the 'guide'?