Welcome To The Jungle, We've Got Fun & Games
INTRODUCTION TO THE JUNGLE
The purpose of the Jungler early game is to clear various jungle camps (in your assigned area). These camps allow you to earn experience and coin (your teammates will be earning their XP and Coin in lane). You're also responsible for ganking during the laning phase of the game. This means that when you have the opportunity you needs to jump in lane to try and secure a kill on their Marksmen (ADC) preferably. Ping when you wanna gank the lane and type in chat. IF your teammates have any intelligence they will try to discretely kite the enemies close to you for a gank. Always come in from one of the stealth pads OR pick up a car beside the raider spawn point to throw and slow your enemy. Be careful as the enemy team could have cameras set up to see if you are coming. If they back up when you come and they have cameras you have to let your team know that the area is warded. Next time come in from a different area to try and secure the gank.
ALSO, you NEED to defend your TURRET if your teammates over extended themeselves without you and got themselves killed. You will also be responsible for getting key map objective such as the relays that will rotate coming off cooldown and will need to be locked back down to your team - locking them can provide you with elite drones in specific lanes to help push the lane. KEEP AN EYE on the TOP of your screen that will give you a timer for when your Relays, Raider and DDD will be up again. AND ALSO KEEP IN MIND - Elite Camps (Middle Of Map - What You Protect on Invade/Defend) will re-spawn 3 minutes after you kill them, so keep an eye on them as they are worth a lot of coin and you DON'T want your enemies grabbing them from underneath your noise. You will also need to ping your team when you think it's a good time to get the DDD.
__________________________________________________________________________________________________________
SKILL USE TIPS
The more you understand the skills, the better you will be at using them/timing them perfectly! Please keep in mind that you need to stay out of the eye of the storm (middle of the team fight)!
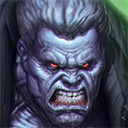
KEY: Hit your THE MARCH (E) to empower your CLOBBER (Q) and CRUSH (W).

CLOBBER (Q) - Cooldown: 6.0s 30 Will
Solomon Grundy rushes forward, stopping at the first Champion he hits, dealing 65 Power Damage, causing them to be Knocked Back and Slowed by 15% for 1.5s.
Empowered - The March: Grundy punches the target in a chosen direction, turning them into a missile, dealing 65 Power Damage to enemies they pass through. If you want to THROW the enemy towards your teammate OR away make sure you point and click your mouse in the direction you want to throw him BEFORE you click Q for the Enhanced Clobbers.
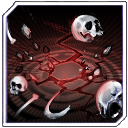
CRUSH (W) - Cooldown: 8.0s 20 Will
Solomon Grundy crushes the ground, dealing 40 Power Damage to enemies in the area.
Empowered - The March: Grundy launches his target skyward and then pile drives them into the ground, Knocking them down for 1s and dealing 25% additional damage.

THE MARCH (E) - Cooldown: 18.0s 65 Will
Solomon Grundy gains 15% Move Speed for 3s. The next champion he targets with a Basic Attack becomes Suppressed for 1s and is dealt 30 Power Damage. Move Speed bonus is doubled when facing an enemy. Grundy cannot be Slowed while March is activated and any Slows on him will be removed. NOTE: While Suppressing an enemy Champion, Grundy's Clobber and Crush skills behave differently (please read previous skills MARCH activation above).
TO CLARIFY - "When you press E, you'll get a speed boost and your next Basic Attack is replaced by the skill's suppression. So you'll press E and basic attack someone. Once you get them in the choke hold, you have 1 second to press Q. Once you press Q, Grundy will throw the enemy champion in the direction that your mouse was when you pressed Q." - Chronolinq
Follow the same process to use your W to knock the enemy up in the air and pile drive them into the ground. If you choose this move, follow this up by a regular Q to slow their escape again.
BURIED ON SUNDAY (R) - Cooldown: 100.0s
Solomon Grundy oozes noxious substances for 7s, infecting targets by coming in contact with them or hitting them will skills for 3s. Affected targets take 1% of their Max Health as Power Damage per second and infect other targets they come in contact with. Grundy heals for 0.4% of his Max Health per second, for each Champion infected.
BORN ON MONDAY (PASSIVE)
Upon death, Solomon Grundy becomes unattackable and untargetable while he gets ready for one last stand. After 2s, Grundy, no longer unattackable and untargetable, comes back to life with his non-ultimate cooldowns reset and full health restored. Solomon Grundy's Damage is halved and he cannot receive healing. He will stay in this state for 5s or until he is killed for good.
__________________________________________________________________________________________________________
STARTER ITEMS:
 Marauder Shield (2)
 Health and Damage to Creatures.
T1 -
Marauder Burst 1: +10% Damage to creatures
T1 -
Marauder Defense: Blocks 5 damage from creature attacks.
T2 -
Marauder Syphon: When you damage a creature, regain Health equal to 5% of the damage dealt and Will equal to 3% of the damage dealt. NOTE: Move right into
 Atlantean Royal Seal (4)
 After T2.
 Modular Health Vial (2)
 Restores 125 Health over 15 seconds. Each use consumes 1 of 2 charges. Charges are refreshed when returning to base. Charges are reset to 0 on upgrade.
PLEASE NOTE: When you run out of room for your next item, sell the
 Modular Health Vial (2)
 first. Then after you have that item built and you are going onto the last item, sell your
 Marauder Shield (2)
 last.
__________________________________________________________________________________________________________
CORE ITEMS
I first like to establish Health and Power Damage with
 Atlantean Royal Seal (4)
 then move onto the Health and Attack Armor of
 Metallo's Heart (3)
 . Once I have established early game health I move onto Health Regen, Attack Armor and Resilience of
 Diana's Bracers (3)
 as many times Map Roaming may start and you may not have time to go back to base if your team needs you at a relay or turret to defend. After this I move onto either or
 Kryptonian War Armor (3)
 I like this over
 Mirror Master's Prism (4)
 as it gives you Health Regen and movement speed. Followed up by
 Fragment Of Mogo (3)
 for more Health and Attack Armor along with its Activate. WHY BUILD TANK JUNGLER over a Power Damage Focused One!?!? Because a lot of the times in normal queue you probably won't even have a TANK at all. You need a tank to not only help crowd control the enemies so you can get into position, but also to absorb as much damage a possible.
 Ruby Of Life (4)
 Health and Health Regen.
Passive - Health Collector: +5 Health and +.25 Health Regen per 10s when you collect a coin (max 200 Health, 10 Health Regen per 10s, lose 50% of your stacks on death). Coins give double stacks on Gotham Heights.
 Atlantean Royal Seal (4)
 Health, Power Damage and its Passive - Skill Harrier: Causes your targets damaged by your skills lose 20% Move Speed for 1.5s (10% for multi-target skills). The passive works amazing with his ULT, in addition to this it gives you a nice balance of Health and Power Damage.
 Metallo's Heart (3)
 Health and Attack Armour. Its
Passive - Dampening Aura: Causes -20% Attack Speed for all nearby enemy Champions is a great addition to team fights. This works great with your Ultimate and amazing when combined with the next item you build, Atlantean Royal Seal.
 Fragment Of Mogo (3)
 Health and Attack Armor. Its
Active - Burning Core: Activate to deal damage over time to all nearby enemies. Deals 20 Power Damage (20 + 4% (0) Bonus Health) and then 10 Power Damage (10 + 2% (0) Bonus Health) each second decaying to 5 Power Damage (5 + 1% (0) Bonus Health) over 10s (90s Cooldown).
NOTE: If the power damage champion BLASTER is causing lots of trouble for you skip to
 Entropy Aegis (3)
 over
 Fragment Of Mogo (3)
 then come back and build
 Fragment Of Mogo (3)
 .
ADDITIONAL DEFENSIVE OPTIONS
 Entropy Aegis (3) Passive - Skill Block 1: :
 Grants a Skill Shield that prevents the damage and effects of the next enemy skill (60s cooldown). This item is great to have against enemy teams that have a Shazam, Wonder Woman, Atomic Wonder Woman and any other surprise attack champions/global ultimate champions. This shield will block 1 skill shot, then will re-set again, once 60s goes by. This way the enemy team now has to try and hit you out of position first to proc your Aegies THEN try to go in for the kill. This is a great items that makes the other team have to work harder to get to you and gives your team time to focus and re-position themselves.
 Mirror Master's Prism (4)
 Health, Power Armor and its
Passive - Deadly Mirror 2: Gives 20% Power Reflect. If you are in need of Power Armor I would only build this POWER ARMOR item as many Power Damage champions will legit 1 shot themselves. THIS IS an OPTION But I still suggest
 Entropy Aegis (3)
 over it for it's passive.
 Suit Of Sorrows (4)
 Health and Attack Armor. Its
Passive Mirror Defense 2: +15% Attack Reflect. Great item if you find yourself needing more attack armor.
FURTHER DAMAGE OPTIONS:
 Cosmic Staff (3)
Gives you Power Damage and Cooldown Reduction. It's
Passive - Disintegration: Dealing damage from skills applies an effect dealing 2% of the target's current Health each second as Power Damage for 4s. (Max 120 per second vs creatures and drones) AND
Passive - Wounding Skill: Targets of your skills are Wounded (healing and regeneration reduced by 50%) for 2s. Targets below 50% health are Wounded for 4s. This is great in a long drawn out battle and add some punch to your attacks. It's passive is great for team fights, especially when moded. ONLY use this if the other team is not doing any damage. If they are, then proceed to keep on building tank.
SITUATION OPTIONS:
 Amulet Of Isis (3)
 Health, Will, Movement Speed and Cooldown Reduction.
Mercury's Gift: Activate to give nearby allies a 35% Move Speed boost for 4 seconds. I know this isn't a popular item for Junglers most of the time, HOWEVER, in ABOUT 75% of the solo queue matches I've been in the bot lane support never builds this crucial item for team escape/enemy chase down. Every support should build this item (non-negotiable). Even if you ask them to build it and they do...if it's not MODed it's little more than useless as any
 Super Speed
 Stolen Power or dash can catch up to you or escape from an UnModed Amulet of Isis. If are solo MOD this items instead of
 Metallo's Heart (3)
__________________________________________________________________________________________________________
MODS AND AUGMENTS:
These MODS can be changed depending on what part of the above items you want to focus on building. Keep in mind you want to choose items that are going to best buff both you and the team for surviving in team fights, let the Assassins, Marksmen and Blaster worry about building damage. You need to worry about absorbing damage and reducing the damage dealt to your team and crowd controlling the enemy team.
 Atlantean Royal Seal (4) Passive - Skill Harrier 2:
 Targets damaged by your skills lose 25% Move Speed for 1.5 seconds (15% for multi-target skills) (Tier 4) This is IDEAL for her PIES! skill to help slow them down a little bit.
 Metallo's Heart (3) Passive - Improved Aura:
 -25% Attack Speed for all nearby enemy Champions (Tier 3)
 Cosmic Staff (3) Passive - Disintegration:
 Dealing damage from skills applies an effect dealing 2% of the target's current Health each second as Power Damage for 4 seconds. If the target is hit when below 50% Health, the effect applied deals 1% of Maximum Health each second. (Max 120 per second vs creatures and drones).
These augments give you a nice balance of early game flat health and late game scaling health.
CASTLE: 24.6 Health and 3.25 Attack Armor
BEST: 3.01 Health/Level To 57.19 (Max Level) and 0.32 Attack Armor To 6.08(Max Level)
WRECK: 3.01 Health/Level To 57.19 (Max Level) and 0.32 Power Armor To 6.08(Max Level)
WOLF: 24.6 Health and 3.25 Power Armor
I am focusing on a full tank jungler, these MODS and AUGMENTS are the best mix of having both Flat Helath/Armor early game and Scaling Health/Armor Late Game.
__________________________________________________________________________________________________________
STOLEN POWERS:
I'm not going to baby you around on this one. All of these are viable options for any Jungler. If you have never jungled before I suggest using
 Detonate
 to destroy enemy camps quickly (this also works great to explode a car to get to the Dooms Day Device (DDD )quickly to steal it form the enemy team OR to destroy the car to escape from the bottom instead of running out the main exit of the DDD. The next power to use as a baseline for new players is
 Psychic Assault
 as it is ideal when it comes to slowing down the targeted enemy champion for a successful gank if you lack the finesse of a sneak attack (this will come with practice).
AT LEAST 1 JUNGLER HAS TO HAVE
 Detonate
 OR
 Super Strength
 OR
 Consume
. Many times in order to escape the DDD after killing it OR ganking whoever killed it on the enemy team you will need to destroy the cars to get to them to take it or destroy it to escape.
OPTION 1 -
 Surveillance Camera
 Cooldown: 5s Gain 3 charges that are spent to place Stealthed Surveillance Cameras that grant vision in an area around them for 180 seconds. Up to 2 Surveillance Cameras may be on the battlefield at once. Charges are refilled automatically upon returning to base. I suggest using
 Robin's Surveillance Camera
 as your go to cameras because you get 5 charges instead of 3. This set up is ideal for all roles as it prevents you from having to run to base to get more charges of cameras each time you run out. If you are jungling the TOP AREA, you should be warding for your Top Lane Teammate. It's became a very prominent META in Ranked Matches. You want your Top Lane to be able to focus on stolen powers such as
 Meteor Drop
  Healing Wave
 and
 Invulnerability
. These options will allow them to stay in lane longer and help to better secure map objectives and kills. Even if you are BOT JUNGLE you may have to grab cameras because 80% of the matches I've been in (when I'm not Bot Support) neither people on bot lane take cameras, which is a HUGE MISTAKE on their part.
OPTION 2 -
 Psychic Assault
 Cooldown: 120s Places a 35% slow on a target enemy for 2.5 seconds. I suggest using
 Zatanna's Psychic Assault
 Cooldown: 120s as it applies a stronger slow and lasts longer - Target enemy Champion loses 40% Move Speed for 3 seconds OR
 Star Sapphire's Psychic Assault
 Cooldown: 120s as it reduces incoming healing as well as slowing. Places a 35% slow on a target enemy and reduces incoming healing by 50% for 3 seconds.
OPTION 3 -
 Detonate
 Cooldown: 120s - Deal 40 Power Damage to all Champions and drones near target enemy drone, creature or environmental object. Creatures in the area (including the one targeted) are dealt 160 True Damage instead and environmental objects are destroyed. I suggest using
 Atomic Joker's Detonate
 Cooldown: 100s as Atomic Joker's Detonate has a shorter Cooldown.
OPTION 4 -
 Super Strength
 Cooldown: 90s Pick up Large Object: Throws the object, dealing Attack Damage and Slowing enemies in an area. Pick up Small Object: Throws the object in a line, dealing 80 Attack Damage to the first enemy it hits, and knocking them up. I suggest using
 Wonder Woman's Super Strength
 Cooldown: 90s as it allows your Champion to pick up and throw Environmental Objects even farther (by 200).
OPTION 5 -
 Consume
 Cooldown: 60s Deal 75 True Damage to target enemy drone or creature and you are healed for 50. Environmental objects can also be targeted and are destroyed after healing you. I suggest using
 Nightmare Batman's Consume
 Cooldown: 60s as it restores bonus health (True DMG: 75 + 10 per level & Heal: 30 + 8 per level) OR
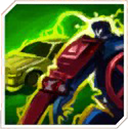 Mecha Superman's Consume
 Cooldown: 60s as it restores more Health based on your bonus health.
OPTION 6 -
 X-Ray Vision
 Cooldown: 100s For 8 seconds your Champion has increased vision range, can see enemies in Stealth, can see through barriers and into stealth pads. I suggest using
 Atomic Poison Ivy's X-Ray Vision
 - Cooldown: 85s as Atomic Poison Ivy's X-Ray Vision has a reduced cooldown OR
 Gaslight Catwoman's X-Ray Vision
 Cooldown: 100s - Gaslight Catwoman's X-Ray Vision has a longer vision range.
OPTION 7  Healing Wave
 Cooldown: 120s Heal yourself and nearby allies for 50 Health. Further Healing Waves within 30 seconds will have their effectiveness reduced by 50%. I suggest using
 Arcane Green Lantern's Healing Wave
 Cooldown: 120s as Lantern's Healing Wave grants increased Power Armor and Attack Armor to you and nearby allies OR
 Krypto's Healing Wave
 Cooldown: 120s as
Krypto's Healing Wave applies an additional heal over time to those healed. SADLY a lot of the time NO ONE in the solo normal queue will pick up any healing waves, so you might just have to grab this for team fights.
OPTION 8 - Less Poplar and more a Top Lane Stolen Power -
 Meteor Drop
 Cooldown: 90s Drop a meteor on the target location, dealing 60 Power Damage in an area around it. The meteor persists for 120 seconds as a Small Environmental Object. I suggest only using
 Atrocitus' Meteor Drop
 Cooldown: 90s as
 Atrocitus' Meteor Drop
 slows enemies truck. I'd only use this if you REALLY want to. The other options are far more viable.










 Super Speed
 Detonate
 Psychic Assault
 Super Strength
 Consume
 Surveillance Camera
 Robin's Surveillance Camera
 Meteor Drop
 Healing Wave
 Invulnerability
 Star Sapphire's Psychic Assault
 Atomic Joker's Detonate
 Wonder Woman's Super Strength
 Nightmare Batman's Consume
 Mecha Superman's Consume
 X-Ray Vision
 Atomic Poison Ivy's X-Ray Vision
 Gaslight Catwoman's X-Ray Vision
 Arcane Green Lantern's Healing Wave
 Krypto's Healing Wave
 Atrocitus' Meteor Drop
 Why would you tell people to mod Royal Seal over Prism. Until 2.0 sometime in the distant future, it is broken and should be modded in every tank set until it is fixed. I would also put priority in E since it has such a long cooldown, and is probably the most essential skill to use on Grundy. If use E and max the supression time then W to keep them in the one spot for AoE or massive focus, you will certainly kill the target.








 where the FUCK is the 'guide'?